
Showing posts with label crafting. Show all posts

October 27, 2014

Your Monday Quickie * Follow The Yellow Brick Road, Witches


I don't know about you, but things around Casa Callahan have been running behind for weeks.  Last week's stomach plague didn't help me catch up either.  So, it wasn't until this weekend that we got around to decorating for Halloween.  While it's not my big decorating holiday (hello, bring on Christmas!), The Hubbs and bonus daughters love it and they go all out. We've got lights and carved pumpkins and some creepy skeleton hanging from the front porch light that starts shaking and moaning when you move past it. But I can't help but feel like we're missing something.
I have a good friend in Atlanta who takes things to a serious level when it comes to Halloween.  First, she's queen crafter (remember when we made the decorated coozies with the bonus daughters (and later while at fishing camp in Canada)?  Her idea. And when we used the Clorox pens to create sayings on tshirts? She was there helping craft once again).  You should see her front porch, complete with bats, witch hats and skeleton "pink" flamingos in the bushes.  It's a sight to behold.

She's such a super crafter that she was the brainchild behind the backdrop for a seven year old's birthday party with a Wizard of Oz Theme recently.  And while I realize that it wasn't exactly Halloween in Oz when Dorothy was there, it was fall, in Kansas I think. And I think they used to show the movie near Halloween each year.  And the flying monkeys were friggin' scary as hell.  So it seems appropriate that on the week of Halloween, my friend Jody and I give you some possible decorating ideas.  With that, I'm turning today's blog over to Jody.
HI, blogland.  First and foremost - let's get this out of the way now. I do not like social media. I think it is weird that people want to share random things with others. Also, I have a thing about privacy, but that can all be for another time.  I heart my Wendy in a true and deep way and I support her need to share and create an environment of sharing, so I am compromising my dislike for social media (Ohhh the martyr that I am).
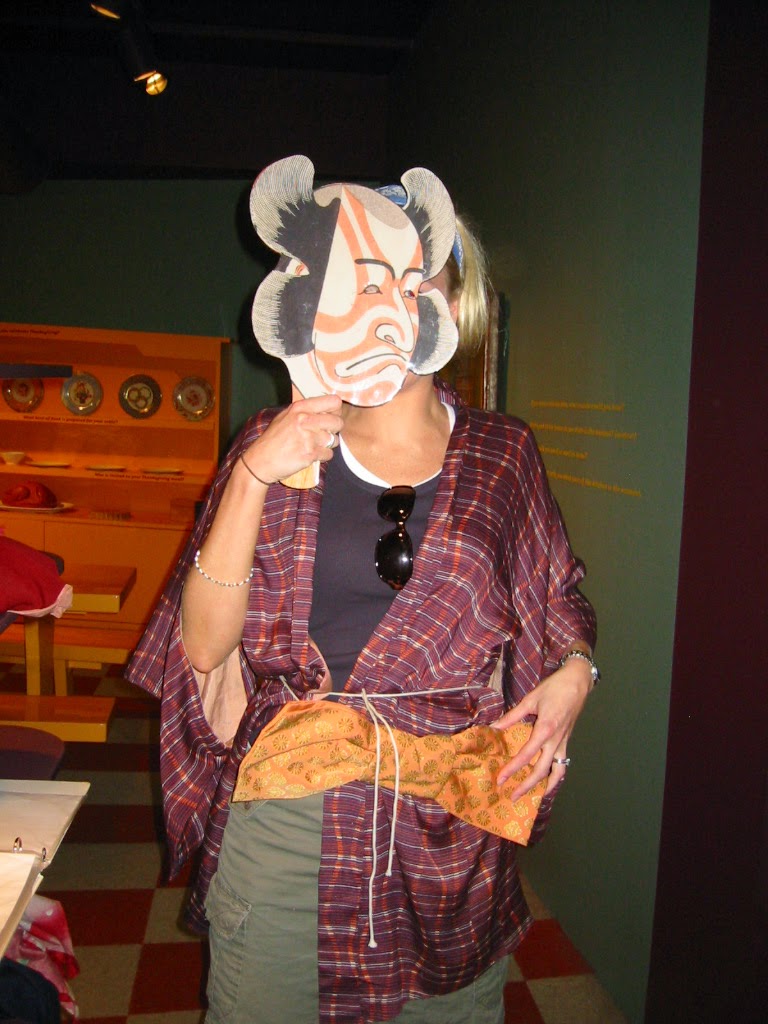
Jody dressed up as an Asian dude at some museum in Chicago when visiting me there a zillion years ago.
I do LOVE crafting and themed parties, and dressing up, and general silliness and merriment. So much so, that I convinced one of our other besties, Susan, that a Wizard of Oz birthday party would be awesome for her daughter's seventh birthday (I'm not sharing the seven year old's name because that would really break my rules. Rest assured she is awesome and hilarious and smart and well-deserving of said party). Susan reluctantly agreed to the extravaganza once I told her I would help craft all the things.  


Enter Pintrest.  We love and hate "The Pinterest" because it can be a time suck. We love and hate it in spite of all the cute ideas. And we love and hate it because it makes us freakishly competitive with strangers over how “cool” our lives are.  But mostly I hate it because there are rarely any directions on how to execute anything other than cooking---and ewww gross to cooking (*editors note (which is me, Wendy) Jody is not into the cooking thing, but luckily her husband Jake is. This keeps them from starving or living on frozen pizza). This is why Pinterest sucks.


So, amazing pics of Yellow Brick Roads can be found, and I needed one for the party.  Directions on how to actually make said road, that make sense and are achievable? Not so much.  But I. . . . I bring to you instructions on how to make a yellow brick road for a seven year old's birthday party.  Instructions that any normal person can execute. This is why I am awesome!!


Things you need:


Step 1-  Park your husband or significant other front of the football game—you will need to spread out and will not want any comments from the peanut gallery while making this. Make sure he has beer and snacks to keep him out of your hair for at least an hour. If your kids that will be in your hair, I am lite on solutions for that one, as that is not an issue in my life. Benadryl?  Maybe "learn about football with Dad" time? Play outside in traffic?  I'm out of ideas here.


Step 2- Cover your work space with plastic sheeting. Turns out I had some leftover super ugly wrapping paper my neighbor's kid had been selling door to door. It worked like charm.  I am fortunate enough to have a fair amount of kitchen counter space to work with. Dining/kitchen tables may also be an option. The floor works too, but you will probably get stiff and there is a high likelihood of “accidental premature walking” on said road.


Step 3- Unroll brown craft paper.  Doing this in sections is the way to go. I was able to do four feet at a time.  I would not go much longer than that, because it can get hard to move it around by yourself if you have anything longer than that. Use the almost rotten banana or whatever else you have on hand as a weight on the end.


Step 4- I bought Tempera Paint at Michael's (you could also order it online here). It is non-toxic and cleans up with soap and water. SHAKE IT A LOT. Odds are it has been on the shelf forever and has settled a bit. Pour about a quarter of it into the paint tray liner thingy.


Step 5-  Get the giant sponge a little damp—I found slightly damp to slightly dry worked best—bone dry was no bueno and super wet was no bueno.  Dip your sponge into the paint, scrape off any excess and apply to the paper.


Step 6- “Bricks” should not be uniform in appearance or application. Vary the pattern a little on each row.  Remember munchkins and monkeys have been treading on these forever. :-)


Step 7-  Let it dry a bit. As long as you didn't saturate to the paper, you should be able to move it to a secondary drying location in about 15 minutes.  It will take about another 25(ish) minutes to dry all the way.


Each section (depending on size) will take about 15 minutes to complete and then add in the drying time. I went through a roll and "some" of craft paper and just about three bottles of paint for about 35 feet of yellow brick road. Measure first.


The effect was kind of awesome and fed my freakish need to be a competitive crafter.  Better work has been executed. However you have never seen a more impressed group of  seven year olds! 

Until next time- Craft strong and Craft On!!

Personally, I think it would be totally awesome to have a yellow brick road leading up to my front door for the trick or treaters on Friday. First, I have to find my Glenda the Good Witch costume. Or maybe I'll just dress The Hubbs up as a flying monkey.  Either way, you're welcome. 
post signature

August 21, 2014

Kids and Clorox - Who Knew They Mixed Together So Well?


If I were to say to you, "Hey, let's give the kids Clorox pens and see what happens!" you would probably shoot me one of those "she's lost her ever-loving mind" looks, turn on your heels and walk away.  But I'm rogue like that.  I like to toss a tiny firecracker into the crowd (figuratively speaking, folks) to shake things up a bit.  

We've been highlighting (mostly) crafts this week and I've mentioned that my friend Jody came up from Atlanta a few weeks back.  She is the queen crafter (no really, you should see the embossed note cards she made me - amazeballs!) and she brought up some really fun crafts for the bonus daughters to make.  The koozie/coozies (never will know which is the correct spelling) were all her idea.  And a big hit.  She also brought up a lucha libre mask kit (click here if you have no idea what I'm talking about, of if you'd like to order a real mask of your own) and we ALL made them (pretty sure the ensuing photo will make the front of the Christmas card this year).  

Rocks can be helpful for holding the shirts down.  So they don't fly away. (????)

But I also had a trick or two up my sleeve and told the bonus daughters and the lake neighbor kids to get a colored tshirt and be thinking of a phrase or saying that's important to them (the shorter the better).  I bought Clorox bleach pens and we were set.  

Turns out these handy pens aren't just helpful in the laundry, but also keep bored kids under the age of 15 occupied for at least a solid half an hour.  


You can use other markers to enhance your design (see bow tie above).  And yes, that's wine in that glass.  For the grownups supervising the bleaching.
Here's how:

We took their shirts and put a piece of heavy cardboard between the front side and the back side, inside the shirt (just like with the tie-dye shirts, which we did the same day).  Now take your pen and carefully write your saying or message on the shirt.  It looks like this at first.

The Clorox looks very white while on the shirt, but on black at least, turns the fabric gray.


The key here is (once again) patience while it dries.  Which is harder than it sounds with ten (I think it was ten - there were tons of them and they move quickly, so it can be hard to count them) kids running around.  That's why we had the second craft - the tie-dyes.  Once the Clorox is dry on the shirt (about an hour or so), you very carefully take it to the sink and quickly wash out the bleach by running cold water straight through it at first and then a quick general soak.  Have the washing machine ready to go, so you can pop the shirts in there to get any trace of leftover bleach out.  

It almost looks Halloween-ish with the orange outline around the letters.

Key tips:  

1) Make sure you know how to spell what you want to write.
2) It may be a good idea to "sketch" out what you want to write on your shirt first.  We did it  with our fingers, just to make sure the words would fit, but you could do it with a pen or pencil.
3) You can't really do the front AND back, so choose carefully.
4) Bleach is still bleach.  Even when crafting.  So, be careful with whatever clothes you're wearing.
5) 100% cotton shirts work best.

Now, go turn your kids loose with some bleach pens, get a glass of wine and call it a day.  A win all around.  You're welcome.


August 20, 2014

Coozie or Koozie? Who Cares? Let's Craft One!


Recently my The Hubbs, his brother and sister-in-law and sister and brother-in-law and I went to Canada for our annual "Siblings Trip."  In years past, we've been to Kentucky and the Bourbon Trail, they came to our wedding in Atlanta (that counted fo' shizzle) and before my time, they all took a cruise somewhere (I've seen pictures of The Hubbs with a trash can on his head).  Next year is Ireland (Back to the homeland for their family.  And dark beer for me. Woo Hoo!).  But this year we headed four and one half hours north of International Falls, MN, into Canada (for those of you geographically challenged folks), to a fishing camp called Cygnet Lake.  

The sunset from the front porch of our cabin at Cygnet Lake
It was gorgeous there!  Quiet.  And no TVs.  No cell service (like, none).  No inter webs. We saw deer and bald eagles (The Hubbs asked them if they knew they were in the wrong country.  No response from the eagles. They just sat on their branch majestically.). My sisters-in-law saw a wolf! We all got to hang together and fish by day and play cards at night. And there were cabins just like when you were a kid at camp (but with a kitchen, better beds and indoor plumbing).  I deemed our cabin Camp CallaSamp (a combo of our last names).  And what happens when you're at camp?  That's right! You do crafts!  

Kids crafting "beverage holders" the weekend before the grown ups went to Canada.
Yesterday I showed you the t-shirt craft that we attempted (and that I also attempted several times on white, plain, flour sack dishtowels).  That was on the third night we were there.  But the first night, we had a craft to get us in the "camp" mood (and to help with adult beverage consumption).  My friend Jody had been up from Atlanta to visit us the weekend before and she'd brought this craft idea to us for the kids to try.  I just "grown-up-ified" it a little for the siblings trip.  But as you can see, it worked equally as well for the kiddos as a "cold beverage holder."  

A family that crafts together . . . crafts together.
What you'll need to make your own grown up koozie/coozie (I found all of our items at Michael's but I'm sure you could order most, if not all of it, online):

Blank Koozies/Coozies 
Stick on puffy foam glitter letters
Stick on puffy crowns, sports paraphernalia and other miscellaneous stickers
Glass milk bottles
Glass paint markers
Sharpie markers (these show as BOGO but I found them cheaper at Staples)

The kids koozies/coozies from the weekend before.
The instructions are pretty simple:  Stick. Stuff. To. Your. Koozie/coozie.  Therein lies the beauty.  You can do whatever you want!  You can write on it with your markers.  You can decorate the glass bottles with the glass paint pens (works best if you do that above where the koozie/coozie will cover it, so the foam doesn't rub off what you paint on).  You could even buy glitter glue pens (Jody did for the kids) and decorate with glitter glue.

It's quick.  It's fun and if you're all grownups, you can have a drinkytreat while you do it. Or while you watch the kiddos do it.  As I like to say, it's a win all around!

You're welcome.
 

August 19, 2014

Let's Go Trippin' Like It's 1977


It's Tuesday and we're taking a trip. Not that kind of trip (this is a drug free house, buddy).  A trip back in time.  To the 70's.  Back when things were psychedelic and wild.  So, buckle up and get ready.

On the rare occasion that I have some spare time, I use it to read some of my favorite blogs (The Bloggess and The Whole Smiths are two favorites).  And on the very rare occasion that I've gotten to read them AND I still have some spare time (i.e. The Hubbs is out of town and the bonus daughters aren't here), I cruise Pinterest.  There's so much cool stuff you can find on there! 

One night while cruising the P, I found a crafting idea that I pinned to try with the bonus daughters.  Really, I wanted to try it, but I'm a damn grown up, so we're not supposed to try kids crafts, right?  So, I decided I would "help" the bonus daughters craft it out.  

Remember tie-dyes?  The bonus daughters don't, other than seeing them on Cool Neighbor Matt next door or at the Wake Forest downtown festival.  But I remember making a tie-dye t-shirt in art class in grade school.  It was one of the only times I liked art class until I got to college.  

Anyway, this Pin on the P showed how to make a "tie-dye" without all the rubber bands and the buckets of dye.  A huge bonus when kids are involved.  

Off to Michael's Crafts I went to buy supplies:


White all cotton t-shirts, Sharpie markers in a zillion colors (note: I also found the markers at Staples for HALF the price), and some rubbing alcohol, an eye dropper and white cider vinegar at the grocery store.  I dug out some cardboard boxes from our recycling pile and I was set.

Siblings that craft together stay together. 
So, we crafted up at the lake, and then one of the mom's and I crafted at the lake on big, white flour sack dishtowels, I had everyone make a t-shirt at the Camp CallaSamp sibling's weekend up in Canada, and then I made a few dishtowels for home and friends and t-shirts for my nieces. Lots of crafting. Because it's FUN.  And what a great way to be a super cool, mom/dad/aunt/uncle/grandma/grandpa/neighbor.  The dishtowels make great hostess or housewarming gifts or it's also just a good way to pass time while you're on endless conference calls.  Wait, that's just me.

Step one - the design.
Anyway, on to the instructions.  First: get your t-shirt laid out on the table, with a piece of thick cardboard between the front and the back, inside the shirt.  If you're using something like the dishtowel, just put the cardboard underneath.

Now take your markers and start designing. I actually found a paper plate while we were up at the lake that had a super cool design.  And another on the yoga mat of a woman next to me in yoga.  And then I just started googling stuff for designs.  It's amazing what's out there!  

Step two - add alcohol and let it "tie-dye".
Once you have your design on your shirt, take your eye dropper and fill it with rubbing alcohol (with the cardboard still in place).  Now drop the alcohol right on your design and let it start to run!  Do that with the whole design.  Let it dry (it dries quickly because it's alcohol and it evaporates more than it dries, but don't take the cardboard out until it's totally dry).  

Step three - wash and dry.
Fill up your (clean) sink half way with cold water (I even add some ice and let it melt) and a cup of white cider vinegar.  Take your shirt and carefully soak it in the cold water for a few minutes, while get your washing machine filling with cold water and detergent.  Transfer the shirt to the washing machine and let it run (make sure all cycles are set on cold water).  You can either let it air dry or dry it on a gentle cycle.  And now you're ready to wear it!  Or use it (it's hard to wear a dishtowel).  

I may have gotten a little carried away with the whole idea.  A little.  Maybe.  Here are some of the other designs I've come up with


Our lake neighbor did this one. Isn't it cool!


before applying the alcohol
after applying the alcohol
And before you get all judgey, I spend a LOT of time on conference calls each day for my real job.  And I'm an excellent multitasker.  What?  Oh, sorry - I was making another dish towel.  ;-)

Now go be a cool dad/mom/aunt/uncle/grandma/grandpa/neighbor/friend and get to crafting.  And drop me a note in the comments to let me know how it went and show me your craftiness.

You're welcome.

post signature